By Customer Demand: Databricks and Snowflake Integration
by Brian Dirking, Bill Chambers and Harsha Kapre
Today, we are proud to announce a partnership between Snowflake and Databricks that will help our customers further unify Big Data and AI by providing an optimized, production-grade integration between Snowflake’s built for the cloud-built data warehouse and Databricks’ Unified Analytics Platform.
Over the course of the last year, our joint customers such as Rue Gilt Groupe, Celtra, and ShopRunner asked for a tighter integration and partnership between our two companies.
These and many other customers that already use our products together, have shared their use cases and experiences and have provided amazing feedback. While both products are best-in-class and are built as cloud-first technologies, our customers asked for improvements around performance and usability in the connector. In response to our joint customers’ feedback, we’re happy to introduce the optimized, production-ready Databricks-Snowflake Connector built right into the Databricks Runtime.
What’s the solution?
It’s simple, this connector brings together the best of breed technologies, so you can have industry leading ETL, data warehousing, and machine learning without needing to worry about initial or ongoing configuration and setup. Concretely, Databricks and Snowflake now provide an optimized, built-in connector that allows customers to seamlessly read from and write data to Snowflake using Databricks.
This integration greatly improves the experience for our customers who get started faster with less set-up, stay up to date with improvements to both products automatically. Additionally, Snowflake’s automatic query pushdown can pushdown certain queries into Snowflake. This removes all the complexity and guesswork in deciding what processing should happen where. With the optimized connector, the complex workloads are processed by Spark and Snowflake processes the workloads that can be translated to SQL. This can provide benefits in performance and cost without any manual work or ongoing configuration.
For Stephen Harrison, architect at flash online retailer Rue Gilt Groupe, this means that “since we use Snowflake as our primary data source for accessing all information about our members and products, [with the Databricks-Snowflake connector] it is seamless to directly connect to our data warehouse, directly import to Spark without any time-consuming ETL processes, and write back to Snowflake directly.”
Now let’s see the connector in action!
Using Databricks and Snowflake
First, you’ll need a Snowflake Account and a Databricks account. Once you’ve logged into Databricks, ensure you’ve created a cluster in Databricks, using Databricks Runtime 4.2 or later, and a virtual warehouse (compute cluster) in Snowflake. It’s also worth double-checking that your Snowflake and Databricks accounts are in the same region to get the best performance and lowest cost. You’ll want to set your Snowflake virtual warehouse to auto-suspend and auto-resume so you only pay for what you use.
That’s it! No library to load and no configurations to manage.
We’ve abbreviated some of the code in this blog, but you can follow along with the code snippets in a Databricks Notebook here. There’s a lot more detail about different pieces of functionality, so it’s worth checking out!
Configuring the Connection
First we’re going to need to configure the connection. To do this, we’re going to leverage the Databricks Secrets API to securely store and encrypt the credentials we’re using to access Snowflake.
Once we do that, we can set our options for reading and writing this data.
In Python, it would look like something like the following.
ETL’ing Data into Snowflake
Loading data into Snowflake requires simply loading it like any other data source. There’s no library to load or Spark (or Snowflake Connector) version to worry about - the connector is built-in!
In the above example, we’ve only done a simple write. However, many customers leverage Databricks to perform complex transformations on structured and semi-structured, data to load into Snowflake for downstream analytics or BI applications. With Snowflake, you get the added benefit of native JSON support which means no transformations required on your JSON data. Now that we’ve loaded the data, let’s query it in Snowflake.
Querying data in Snowflake
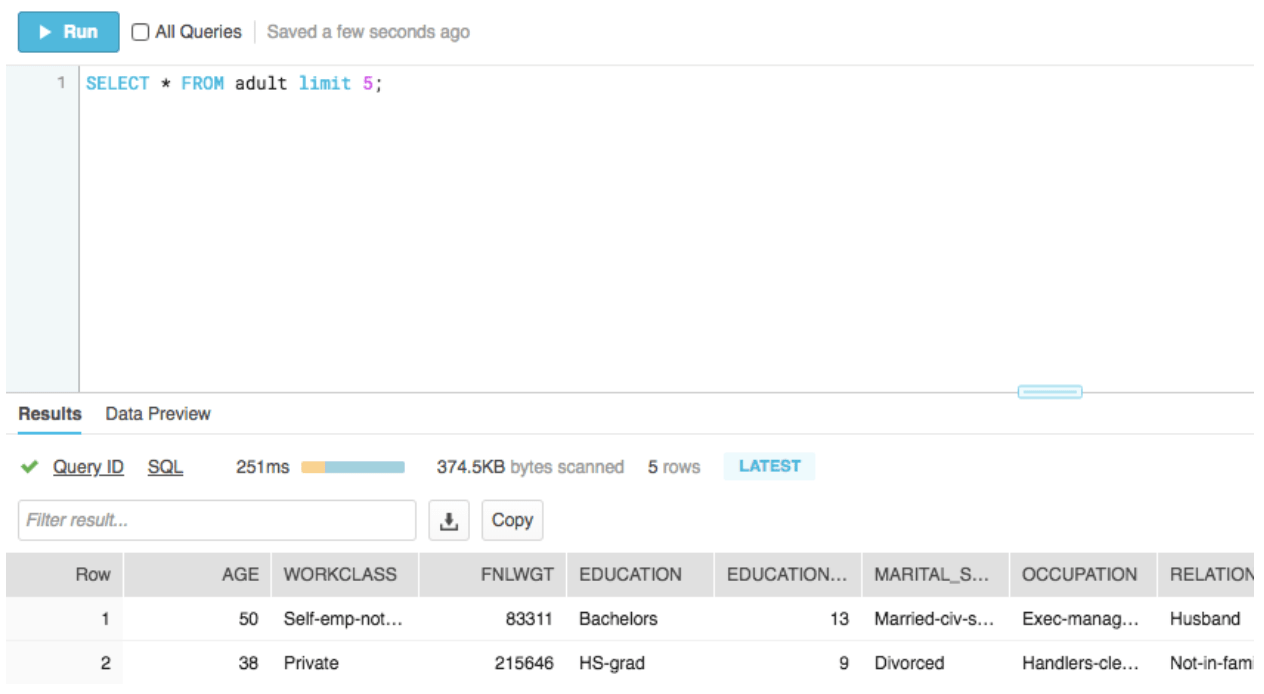
Upon loading the data, it’s simple to query in Snowflake. After enabling a Snowflake virtual warehouse, simply open up a Snowflake worksheet and immediately query the data. Here’s a simple query you can run to manipulate the data:
Upon hitting Run, you’ll see something such as the following.
With the data now loaded into Snowflake, business analysts can leverage tools such as SnowSQL to query the data and run a number of business intelligence applications against the data. Users can also leverage Snowflake Data Sharing to share this data in real time and in a secure manner with other parts of their organization or with any of their partners that also use Snowflake. It’s also easy to connect BI tools such as Tableau or Looker to your Snowflake warehouse, allowing analysts to query large amounts of data stored in Snowflake.
Snowflake is an excellent repository for important business information, and Databricks provides all the capabilities you need to train machine learning models on this data by leveraging the Databricks-Snowflake connector to read input data from Snowflake into Databricks for model training.
Training a Machine Learning Model
To train a machine learning model, we leverage the Snowflake connector to pull the data stored in Snowflake. You’ll notice that it follows the same structure as other Spark Data Sources. Since it’s integrated with the Databricks Runtime, it’s zero-configuration and production ready.
However, there are times when you might want to limit the data pulled from the table for performance or efficiency’s sake. To do so, run arbitrary queries using the Snowflake connector. For instance, filter down to the relevant rows on which you want to train your ML algorithm.
This is a simple example of how the Databricks-Snowflake Connector will automatically pushdown any predicates and even expressions into Snowflake that it can meaning you’ll get optimized performance right out of the box.
Preprocessing and Feature Generation
Now that we’ve loaded the data, we can go about defining our machine learning model transformations inside Databricks. For instance, here we’ll define a pipeline that converts categorical variables into Indexed and One Hot Encoded variables for input into our machine learning algorithm.
We now have a preprocessed dataset to train our machine learning algorithms.
Once we’ve done our train-test split, we can now train and evaluate our model using cross validation and a Random Forest Classifier.
Lastly, we can keep our best model and make predictions with it.
Now that we trained this model and evaluated it, we can save the results back into Snowflake for analysis. Doing so is as simple as using the connector again as shown in the notebook.
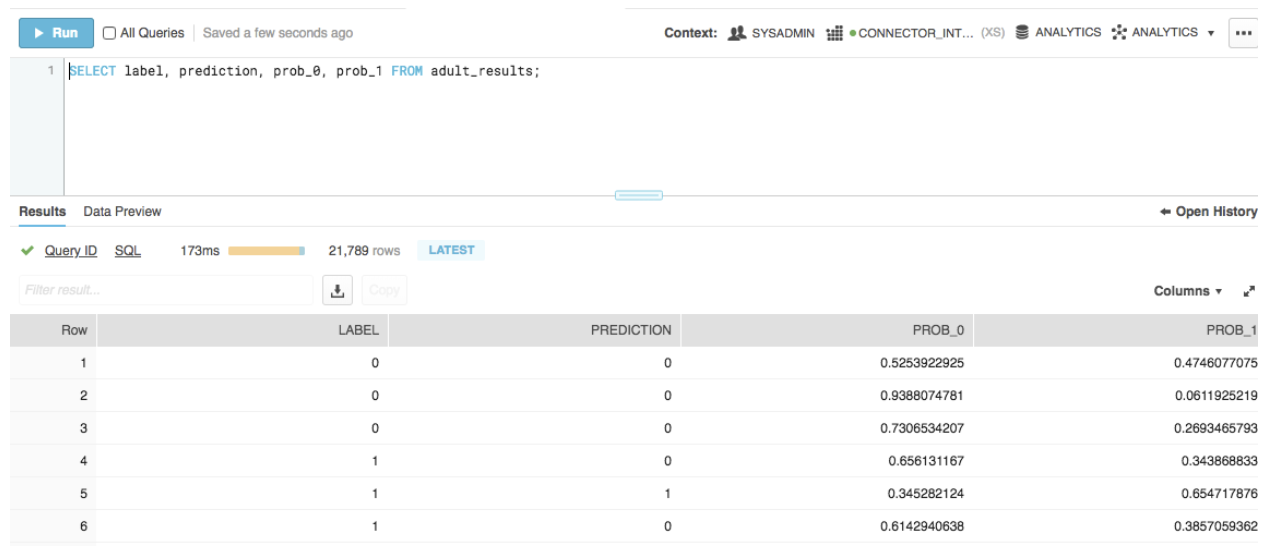
Seeing the Results in Snowflake
In this case, we can easily query our table called adult_results, and users can even access the raw probabilities for each output class.
Conclusion
Databricks and Snowflake provide a best-in class solution for bringing together Big Data and AI by removing all the complexity associated with integration and automating price performance through automatic query pushdown. In this post, we outlined how to use the Databricks-Snowflake Connector to read data from Snowflake and train a machine learning model without any setup or configuration. We then wrote both the unprocessed data as well as the machine learning model’s results back into Snowflake, making it available for immediate analysis.
We’ve already had dozens of customers succeed with these two products, building end-to-end pipelines to derive value from data. We look forward to seeing more customers succeed and we’ll be doing a lot more together in the near future!
Read More
Learn more about Snowflake’s cloud-built data warehouse at Snowflake.com
Read more in depth about the connector in our documentation.
Follow this tutorial in a Databricks Notebook.
Get the latest posts in your inbox
Subscribe to our blog and get the latest posts delivered to your inbox.