Apache Spark Scala Library Development with Databricks
(or Just Enough SBT)
by Jason Pohl
Try this notebook in Databricks
The movie Toy Story was released in 1995 by Pixar as the first feature-length computer animated film. Even though the animators had professional workstations to work with, they started sketching out the story by hand. A practice that is still followed today for all of Pixar’s films. Whenever you’re developing an Apache Spark application, sometimes you need to sketch it out before you develop it fully and ship it to production.
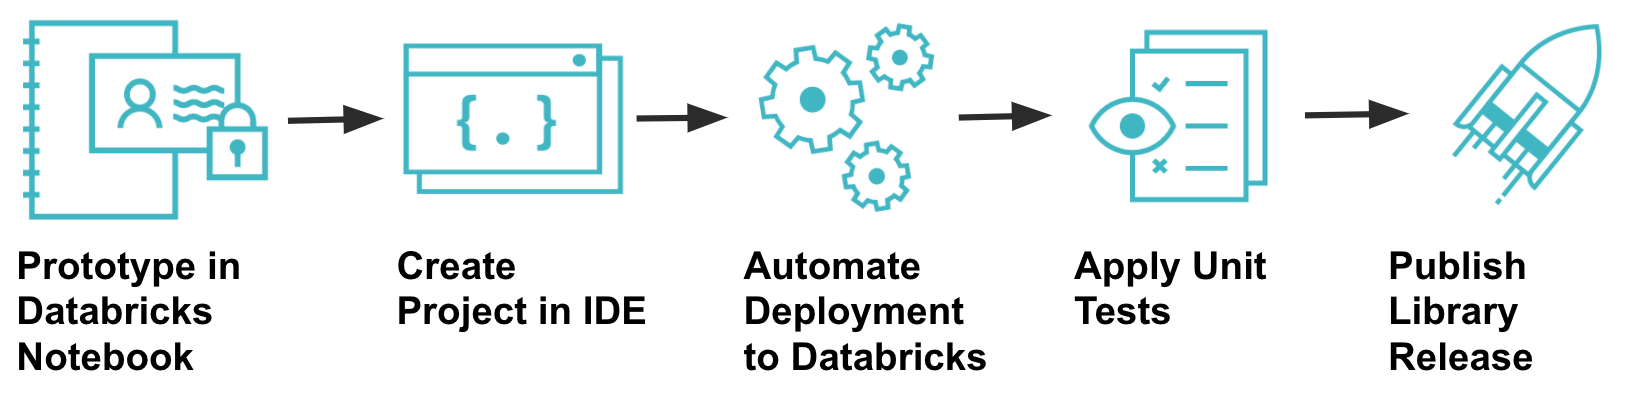
This blog will explain how to quickly prototype a notebook that generates a Date Dimension for a data mart, and then engineer that code into a Scala library with unit tests and a release process.
Prerequisites
Before you attempt to replicate these instructions, you need to make sure that you have a few things installed on your personal workstation:
- Git
- Java (version 8 for Spark 2.0)
- Maven
- Scala
- SBT
- IntelliJ
Prototype In Databricks Notebooks
Just like Toy Story was sketched out on paper by hand, you can use Databricks notebooks to quickly prototype your own ideas. You can write a few lines of code, execute them immediately, visualize the result, and iterate. It only takes a few minutes to spin up a cluster to run your code, and you will be able to get your program into a functioning state quickly while testing against real datasets.
Using a Databricks Notebook, I have prototyped some code that will create a Date Dimension which I will use across several data marts. I use Spark to generate a DataFrame for 100 years worth of dates, and then inspect the schema and the contents of the DataFrame before I create a Spark SQL table from it, from which any cluster can then query or join to it. (See the notebook here)
Create a Project in IDE
Once I have a working prototype that I’m happy with, I want to generate it as a library so that I can release it to other teams for use in their own data marts. To do this, I will begin by creating a new Scala / SBT project in IntelliJ on my local workstation.
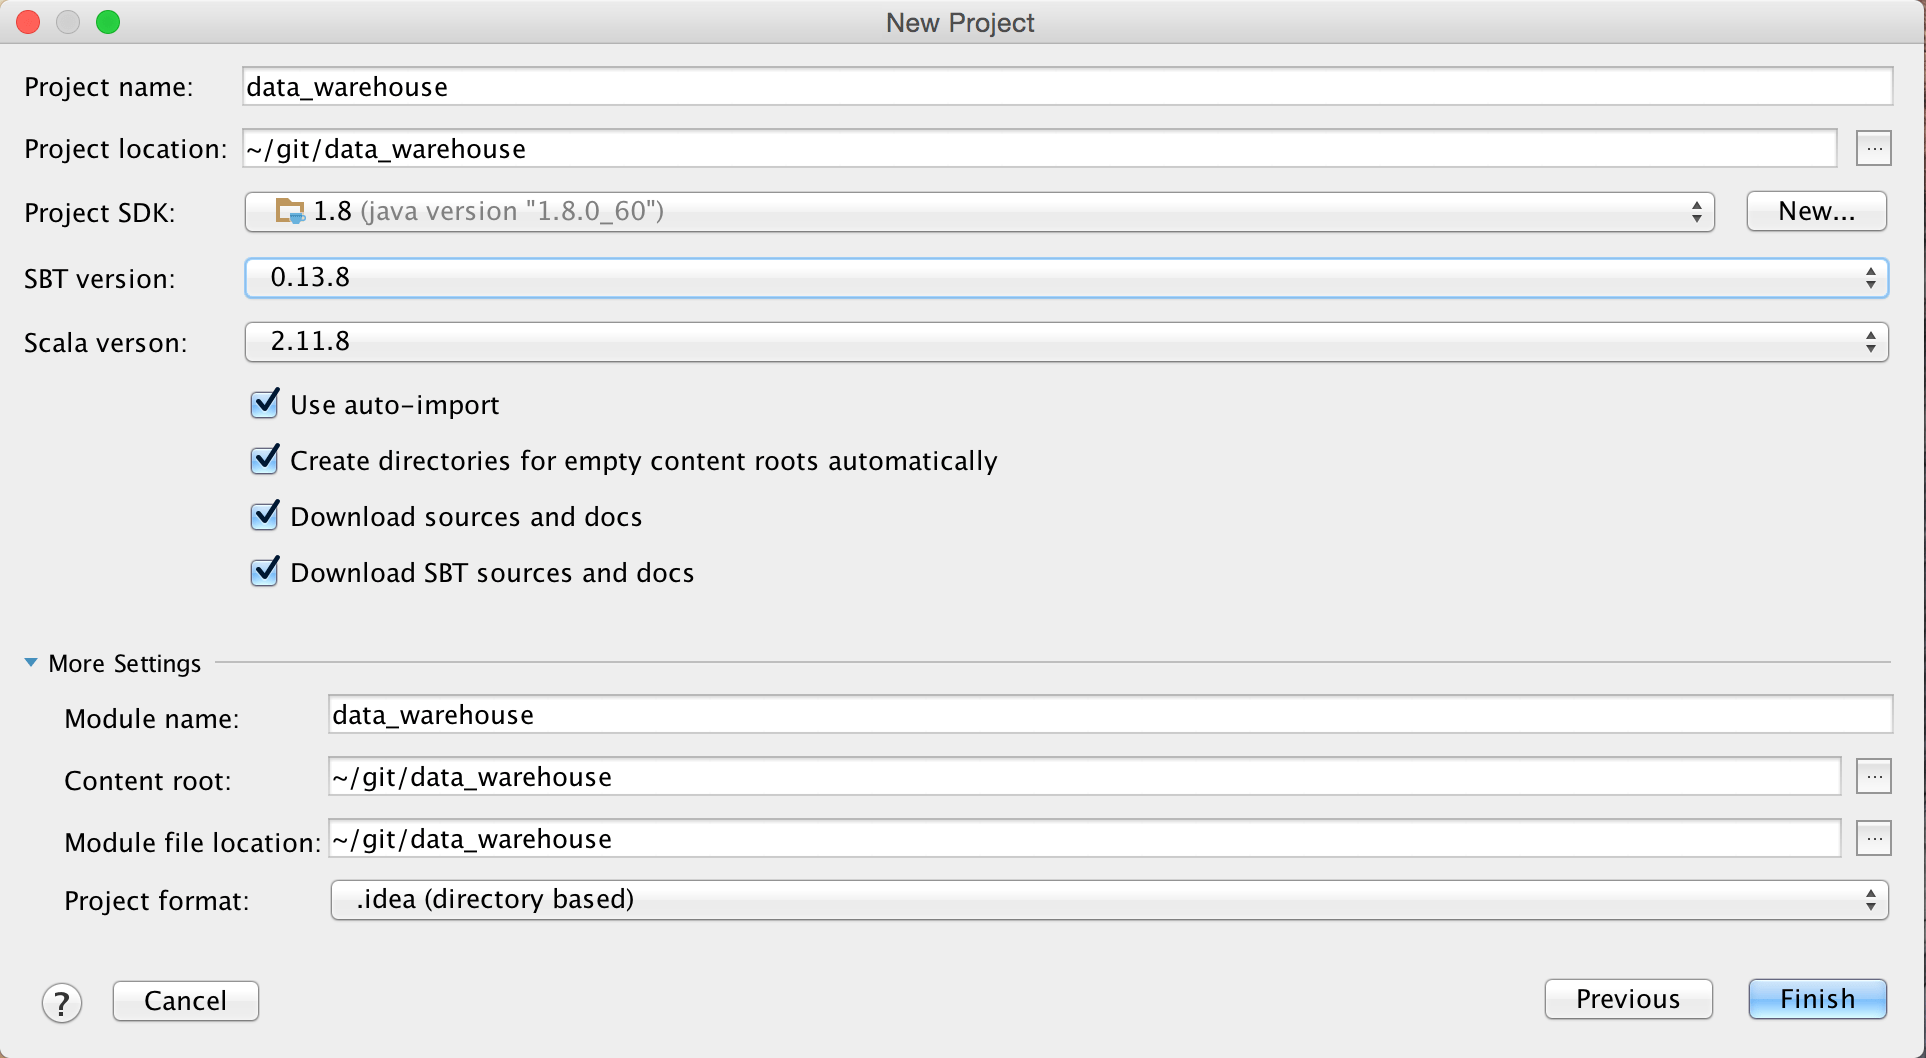
If you’re not familiar with IntelliJ, you can follow these instructions:
- Open up IntelliJ and select “Create New Project” and select “SBT” for the Project.
- Set the Java SDK and Scala Versions to match your intended Apache Spark environment on Databricks.
- Enable “auto-import” to automatically import libraries as you add them to your build file.
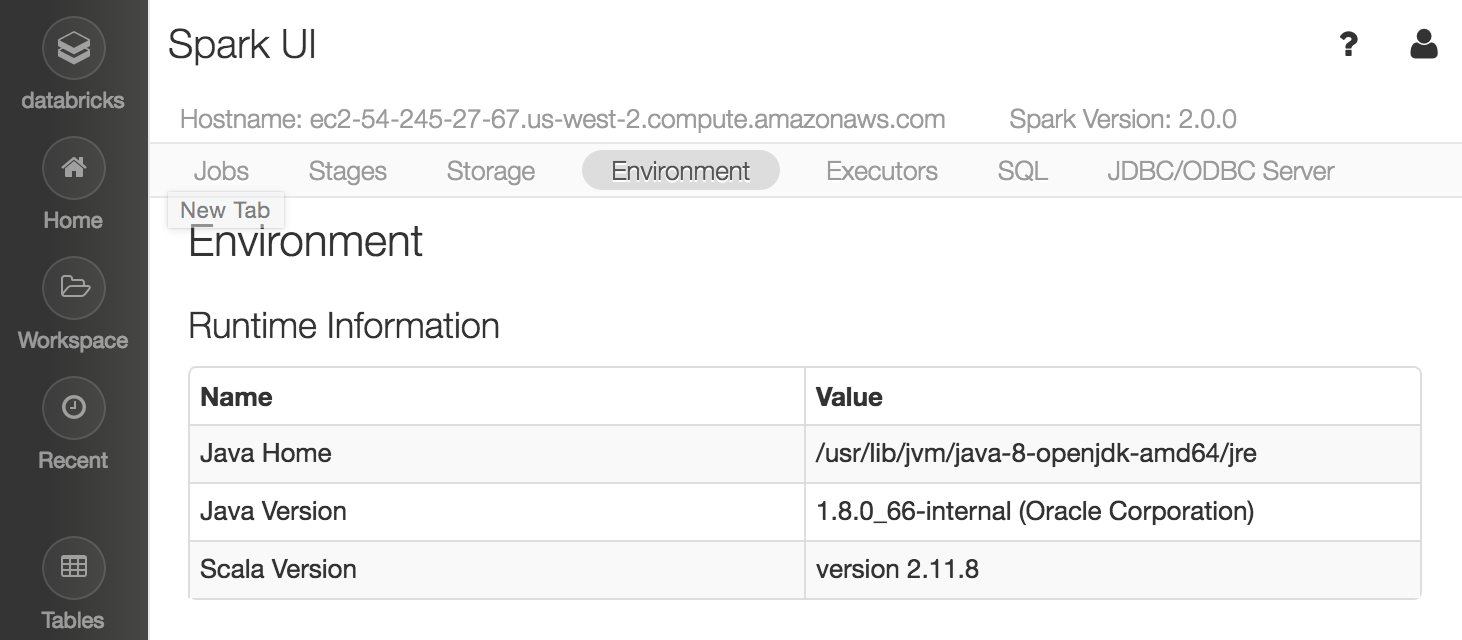
- To check the Apache Spark Environment on Databricks, spin up a cluster and view the “Environment” tab in the Spark UI:
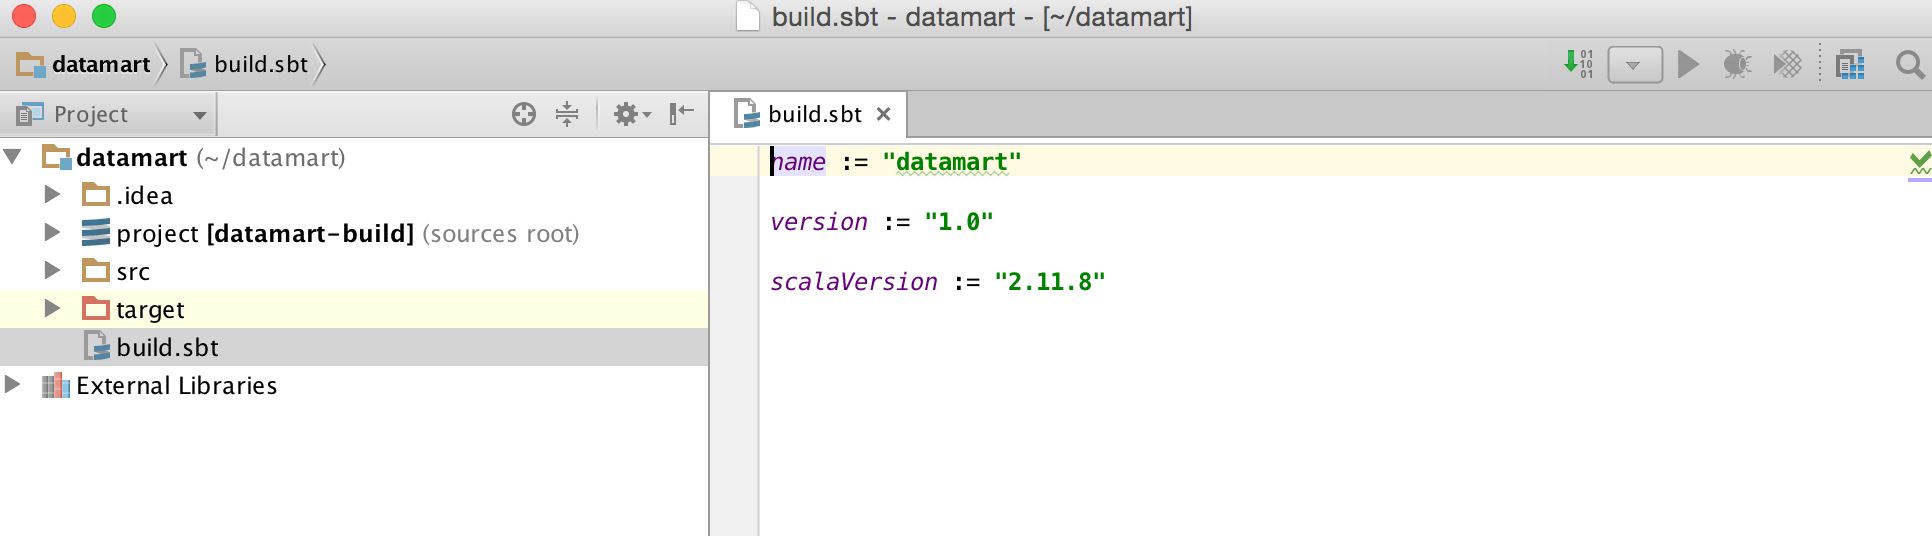
- IntelliJ will create a new project structure for you and a build.sbt file. Go ahead and open the build.sbt file. It should resemble the following:
- Next, add your organization to the build file and include the library dependency for Spark SQL. Whenever you include the library dependencies for Spark libraries, be sure to use %provided%. This will not include the dependency in your compiled JAR as it is assumed that Databricks will already have this library on the classpath for you when you attach it to a cluster.Below is an example of how your build.sbt file should now look:
If you need to know how to write the exact string for the libraryDependencies, you can view it from the SBT tab on the project’s Maven Central page. Be sure that you match your Scala build version with the correct version of Spark.
Here is an example for Spark SQL 2.0 on Scala 2.11.
Restructure Prototype Code into Packages
When I built my prototype, I wrote everything in a single notebook to quickly test things. However, before I package this as a library, I will want to modularize the code into separate classes and packages. I created a single class, DateDimension (source code).
Push to Git Repo
Now is a good time to begin pushing my codebase to GitHub to begin tracking the changes. Before you do, you should first create a .gitignore file in the project root folder so that you can exclude user specific files. There are a number of files that IntelliJ will create for your project, which should not be pushed to a Git repo. You can tell git to ignore these files by creating a .gitignore file in the root of your project. Be sure to include the period at the beginning of the filename (example .gitignore file).
Compile and Package Library
After creating my DateDimension class in the source code, I am ready to compile and package my code into a JAR file. If you’re not familiar with SBT, you can do so from the terminal by running the sbt package command from the project root. This will create a JAR file under the ./target folder:
You can now take this JAR file, create a Library in Databricks with it, attach it to a cluster, import the package into a notebook and start using it. These are a lot of manual steps, so in the next section, I will show you how to automate this.
Automate Deployment to Databricks
Once you start developing your library in IntelliJ, you will likely want to iterate on the code, upload it to Databricks, and retest with your notebooks. Databricks has developed an SBT plugin to make this process more seamless. After you configure it, you can run a single command to compile, upload, attach the library to a named cluster, and restart that cluster.
Create Notebook and Link to GitHub
After my library is attached to a cluster in Databricks, I created a new notebook to be used by a Job that I can schedule to load the date dimension (see the notebook here).
Now, let’s link this to our GitHub repo:
As a best practice, I treat the notebook code as an entry point into an Apache Spark application and write it to a location in my repository that is separate from the path of the source code that is packaged into a JAR. I prefer to write it to ./src/main/notebook
It is easy to synchronize a notebook in Databricks with your repository using our built in GitHub integration. The full instruction on how to do so can be found in the GitHub Databricks Version Control Documentation.
Apply Unit Tests
In order to assure the quality and maintainability of my library, I must create unit tests that can be run each time it is built. To do this, I leveraged the open source spark-testing-base SBT plugin to make testing my code easier. You can leverage the same plugin in your own code by following these instructions:
- Add the following entry to libraryDependencies in your build.sbt file:
"com.holdenkarau" %% "spark-testing-base" % "2.0.0_0.4.7" % "test" - Add the following line to your build.sbt file:
parallelExecution in Test := falseThe version you supply is dependant on the version of Spark you are building your library for.The % “test” that is included at the end of your dependency tells SBT to only include this library on your test classpath and not to include it your final packaged JAR.Be advised that this plugin may implicitly pull in an older version of ScalaTest than you might expect.
Full documentation on the spark-testing-base plugin can be found here:
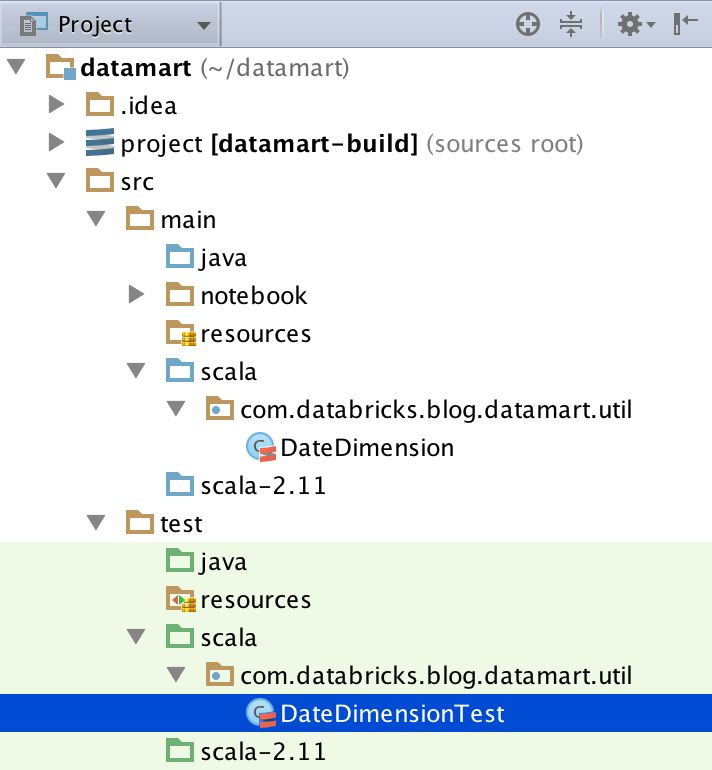
- Create a package structure and Scala Test class under /src/test that matches your DateDimension class (source code here):
- If you’re not familiar with SBT, you can execute the tests from the terminal by running the
sbt testcommand from the project root. You should see output similar to the following:
Publish Library Release
At this point, my library is successfully compiling and passing tests. Publishing a library as a release will snapshot the functionality to a version. Although you are free to use any kind of versioning standard that you like, a best practice is to follow Semantic Versioning. I used the sbt-release plugin to better manage the process of releasing the library. You can do so yourself by following these instructions:
- Add the following line to project/plugins.sbt:
addSbtPlugin("com.github.gseitz" % "sbt-release" % "1.0.3") - Create a version.sbt file in the project root and add the following:
version := "0.1.0-SNAPSHOT" - Remove the same version assignment from your build.sbt file.
Before the sbt-release plugin will generate a release, it first requires a build.sbt file in order to publish to an artifact repository, by setting the publishTo variable.
An artifact repository is typically used by build tools to import dependencies when building projects. If other teams in your organization are going to depend on your library, you may want to leverage one. This allows them to specify which version of your library to use, or to just take the most recent stable version. This could be a repository internal to your network or a cloud hosted one, such as artifactory.
SBT uses the publish action to upload your compiled JAR to an artifact repository. You can find the full documentation for publishing with SBT at this link.
If you don’t have an artifact repository to publish to, you can workaround this by publishing to the Maven repository on your local machine by including the following in your build.sbt file:
The sbt-release plugin performs a number of checks and requires that all changes are committed and pushed to your remote tracking branch in git before it will continue.
To cut a new release, run the sbt release command from the project root folder.
The sbt-release plugin will prompt to first specify the version of the release [0.1.0] and then to specify the next version to continue development on [0.1.1-SNAPSHOT]. You can either use the defaults by pressing enter or specify your own.
The plugin will then compile, package, run unit tests, update the version number, and ask to commit and push the changes to git. If successful, you should see the version in versions.sbt updated to reflect the new version, the branch tagged with the current version, and all commits pushed to the remote tracking branch.
What's Next
This post described how to develop a simple Spark library in Scala to generate a Date Dimension. We started by prototyping in a Databricks notebook. The code was then copied to a local IntelliJ project and unit tests written against it. Several SBT plugins were leveraged to automate the deployment to Databricks, run unit tests, and publish a release of the library. A Databricks notebook was created to imports the library and be scheduled as a Job. The built-in GitHub integration was used to commit the notebook to the same Git repository that hosts our library source code. Hopefully this post will help you to create your own blockbuster feature from an initial prototype all the way to production.
To try this out in Databricks, sign-up for a free trial or contact us.
Get the latest posts in your inbox
Subscribe to our blog and get the latest posts delivered to your inbox.