Tensor Input Now Supported in MLflow
by Tomas Nykodym, Arjun DCunha and Wendy Hu
Traditionally, generic MLflow Python models only supported DataFrame input and output. While DataFrames are a convenient interface when dealing with classical models built over tabular data, it is not convenient when working with deep learning models that expect multi-dimensional input and/or produce multidimensional output. In the newly-released MLflow 1.14, we’ve added support for tensors, which are multi-dimensional array structures used frequently in deep learning (DL).
Previously, in order to support deep learning models, MLflow users had to resort to writing custom adaptors or use the models in their native format. However, both of these approaches have significant shortcomings. Using native flavors breaks the abstraction barrier and, more importantly, native flavors can not be used with MLflow model deployment tools. This new support provides a much better experience for MLflow users working with tensors.
New tensor support
To enable deep learning models, MLflow 1.14 introduced the following changes:
- Extended mlflow.pyfunc’s predict method input and output types to support tensors.
- Updated REST API of served models.
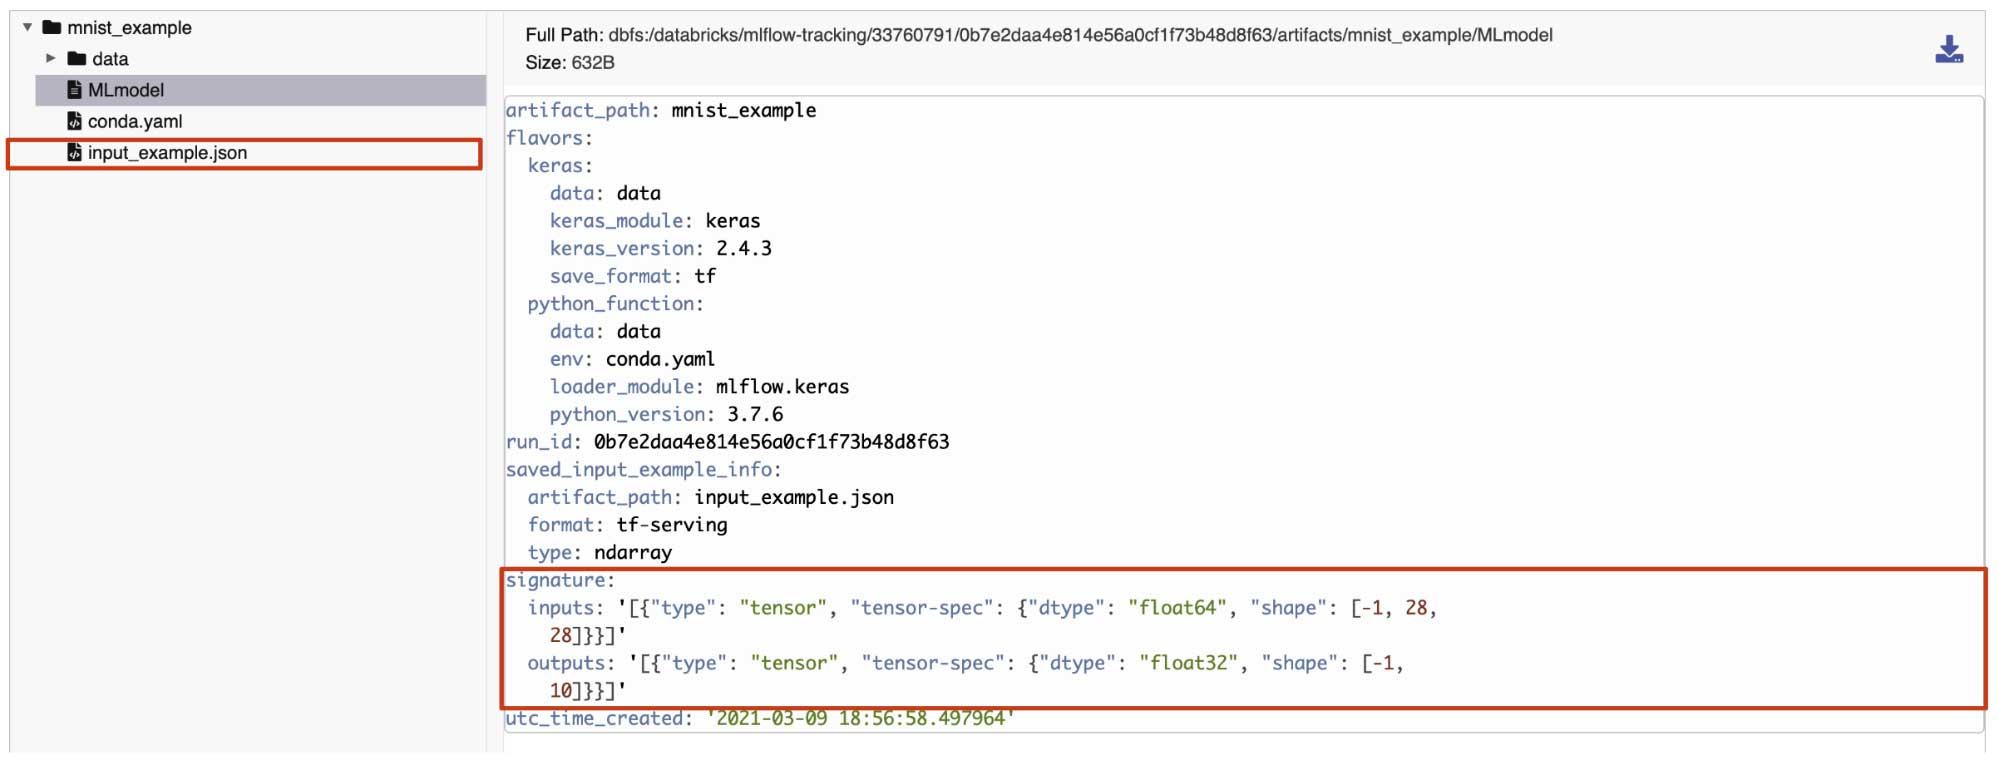
- Added tensor data type to model signatures.
These changes will enable users to fully utilize DL models in the MLflow framework and take advantage of MLflow model deployment. In Databricks, users will be able to pass tensor input to models deployed in Databricks as well as view tensor signatures and examples in the UI. The following section will give more details about the individual changes and highlight their use in an example.
Working with tensors
Let’s demonstrate this new tensor support using a simple image classification example.
For this example, we will train a model to classify the MNIST handwritten digit dataset.
NEW: We can use MLflow’s infer_signature helper to create a tensor-based model signature.
NEW: We can use a single tensor data-point from the training data to store as an input_example to the logged model. Note that the input_example is not limited to a single data-point and may contain a subsample of the training data.
We can now log the trained model along with the model signature and input_example as metadata.
NEW: Let’s load the trained model using the mlflow.pyfunc wrapper and make predictions using a tensor input.
Let’s also check out querying the model via the Databricks UI using MLflow Model Serving. In order to do so, we first enable Model Serving on the Registered Model in Databricks. Once the serving endpoint and version are Ready, we can load the input example that was logged using the log_model API above. Once the input example has loaded, we can send a request to the serving endpoint using the Databricks UI. The returned predictions are now displayed in the Response section of the Model Serving webpage.
User’s can also make REST API calls from their applications to query the model being served. When making a request with tensor input, the data is expected to be formatted based on TensorFlow Serving’s API documentation.
For more on MLflow’s support for tensors and how to get started using them, see the docs on MLflow Models and MLflow Model Serving. Visit mlflow.org to learn more about open-source MLflow and check out the release page to see what’s new in MLflow 1.14. You can try the newly added tensor support in this notebook containing the above example.
Get the latest posts in your inbox
Subscribe to our blog and get the latest posts delivered to your inbox.